메이븐은 빌드 시 pom.xml에 기술된 의존관계를 분석하여, 빌드에 필요한 jar 파일을 자동으로 아티팩트 레포지토리에서 다운로드 받아, 사용자의 로컬 레포지토리에 설치해줍니다. 그런데 가끔은 jar 파일을 수동으로(커맨드라인에서) 다운받고 싶을 때가 있습니다.

당연히 이런 기능을 제공하는 메이븐 플러그인이 있을 것으로 짐작하고 찾아보지만 잘 안보입니다. 좀더 집요하게 검색해보니 2개 정도 나옵니다.

1. http://www.agaetis.fr/public/maven-download-plugin/

2. http://maven.apache.org/shared/maven-downloader/

1번 플러그인은  mvn download:download -Dartifact=group:artifact:version:jar 식으로 실행하면 된다고합니다. 하지만 이 플러그인은 메이븐 메인레포지토리에 아직 등록되지 않았고, http://mvnrepository.com/ 같은 플러그인 검색사이트에서 검색해도 안나오는걸 보면 다른 공공(?) 레포지토리에도 등록하지 않은 듯합니다. 게다가 JDK6을 요구하기 때문에 그 이하 버전의 JDK 환경(저처럼)에서는 실행되지 않는 문제가 있습니다.

2번 플러그인은 메이븐 공식 플러그인 같기도합니다만 실행가능한 goal 등 어떻게 사용하면 되는지 설명이 전혀 없습니다. 그리고 실제로 mvn org.apache.maven.shared:maven-downloader:download 이렇게 실행해보면 일단 플러그인은 다운로드가 되지만 PluginDescriptor 에러가 납니다.

java.lang.IllegalStateException: The PluginDescriptor for the plugin Plugin [org.apache.maven.shared:maven-downloader] was not found.

에혀 이런저런 삽질이 모두 물거품이 되었네요. 구관이 명관인가요. 결국 아티팩트 다운로드 전용 pom.xml을 만드는 것으로 합의(?)를 봤습니다.

  1. <project xmlns="http://maven.apache.org/POM/4.0.0" xmlns:xsi="http://www.w3.org/2001/XMLSchema-instance"
     xsi:schemaLocation="http://maven.apache.org/POM/4.0.0 http://maven.apache.org/maven-v4_0_0.xsd">
     <modelVersion>4.0.0</modelVersion>
     <groupId>download</groupId>
     <artifactId>download</artifactId>
     <version>1.0</version>
     <packaging>jar</packaging>
     <name>DOWNLOAD ARTIFACTS</name>
     <description>for artifact downloads(다운로드 받을 라이브러리 지정후 mvn dependency:resolve 실행)</description>


  2.  <dependencies>
      <dependency>
       <groupId>다운로드 받을 라이브러리의 groupId</groupId>
       <artifactId>다운로드 받을 라이브러리의 artifactId</artifactId>
       <version>다운로드 받을 라이브러리의 version</version>
      </dependency>
     </dependencies>
  3. </project>

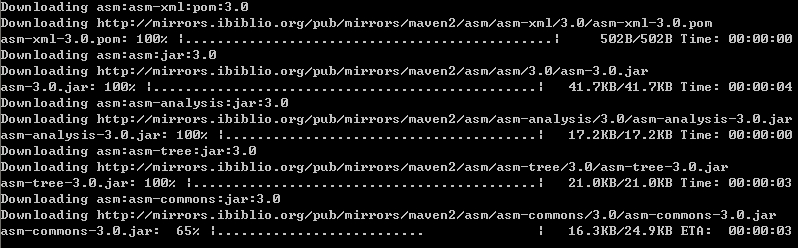
이렇게 pom.xml을 만들어두고 필요시마다 goupId, artifactId 등을 수정하여 mvn dependency:resolve 를 실행하면 됩니다. 테스트해보니 잘되네요. 이정도에서 만족해야겠습니다. ^^;

이 글은 스프링노트에서 작성되었습니다.

Posted by 에코지오
,

이번에는 각종 설정값을 빌드 스크립트에 하드코딩하기 보다는 외부로 빼내어 관리하는 방법을 살펴보겠습니다.
Ant에서는 key=value 형식으로 외부 properties 파일을 이용하고, Maven에서는 사용자홈 경로의 settings.xml 또는 pom.xml 경로의 profiles.xml를 통해 설정정보를 분리합니다. Ant, Maven 모두 스크립트 실행시에 -Dkey=value 형식으로 설정을 입력하는 것도 가능합니다.

Ant와 Maven이 'key=value'라는 1차원적인 프로퍼티 형식으로 설정값을 기록하는 것을 선호한다면, rake나 Buildr은 YAML을 활용하는 2차원적인 트리 형식을 선호합니다. buildfile에서 설정값을 외부로 빼내는 방법은 크게 4가지가 있습니다.

1. 환경변수
스크립트 실행시 key=value  형식으로 입력하면 스크립트에서는 ENV['key']로 값을 받을 수 있습니다. 만약 key에 해당하는 운영체제 환경변수가 있으면 그것을 리턴합니다.

####> buildr upload password=secret

puts ENV['JAVA_HOME']
puts ENV['password']

2. settings.yaml
Buildr을 사용하게 되면 사용자홈/.buildr 디렉토리에 settings.yaml 파일이 생기는데, 여기에 (주로 개발자 개인적인) 설정을 포함할 수 있습니다.

repositories:
  remote :
  - http://www.ibiblio.org/maven2/
  - http://repository.codehaus.org/
  - http://download.java.net/maven/2/

messenger:
  server: jabber.company.com
  usr: notifier@company-jabber.com
  pwd: secret

settings.yaml에 위와 같은 설정이 있으면 스크립트에서는 Buildr.settings.user 속성(Hash)을 통해 값을 읽어옵니다.

puts repositories.remote
puts Buildr.settings.user['messenger']['server']
usr, pwd = Buildr.settings.user['messenger'].values_at('usr', 'pwd')

3. build.yaml
buildfile과 같은 위치의 build.yaml 파일에 (주로 개발자 사이에 공유할) 설정데이터를 넣을 수 있습니다.

artifacts:
  spring: org.springframework:spring:jar:2.0
  log4j: log4j:log4j:jar:1.0
  j2ee: geronimo-spec:geronimo-spec-j2ee:jar:1.4-rc4

jira:
  uri: https://jira.corp.org

build.yaml에 위와 같은 설정이 있다면, 스크립트에서는 Buildr.settings.build 속성(Hash)으로 설정에 접근할 수 있습니다.

compile.with :log4j, :j2ee
puts Buildr.settings.build['jira']['uri']

4. profiles.yaml
buildfile과 같은 위치의 profiles.yaml은 Maven의 profiles.xml과 동일한 역할을 합니다. 보통 빌드환경이 달라지면 다른 설정값이 요구되는데, 이는 프로파일을 통해 관리할 수 있습니다. 즉 프로파일은 빌드환경에 따라 설정값을 다르게 가져가는 것을 말합니다.

development, test, staging, production 등의 빌드환경 중에서 Buildr은 기본적으로 'development' 빌드환경에서 실행됩니다. 빌드 환경은 빌드스크립트 실행시 -e 옵션으로 바꿀 수 있습니다.
빌드 스크립트에서 현재 적용된 빌드환경 값은 Buildr.environment 메소드로 확인 가능합니다.

profiles.yaml에는 이렇게 선택된 빌드환경에 따라 어떤 설정값을 쓸지 YAML 형식으로 적어줍니다.

development:
  db: hsql
  jdbc: hsqldb:mem:devdb
  resource_ext: dev
  wasserver:
    host: 111.111.111.111
    username: testuser
    password: test1234
    deploy_dir: /home/test/deploy/war
    restart: sh restart.sh

production:
  db:oracle
  jdbc: oracle:thin:@bigstrong:1521:mighty
  resource_ext: prod
  wasserver:
    host: 222.222.222.222
    username: realuser
    password: realpass
    deploy_dir: /home/prod/deploy/war
    restart: cd /bea/user_projects/domains/mydomain;./stop.sh;./start.sh

프로파일의 설정값은 빌드 스크립트에서 Buildr.settings.profile 메소드로 읽어옵니다. 

puts Buildr.environment # 현재 적용된 빌드환경
puts Buildr.settings.profile['wasserver']['username'] # 현재 적용된 빌드환경의 설정값
puts Buildr.settings.profiles['production']['wasserver']['username'] # production 환경의 설정 값
Posted by 에코지오
,

Maven은 의존성 관리나 내재화된 빌드프로세스 같은 특징말고도 간단한 설정으로 여러가지 리포트를 생성해주는 좋은 기능을 가집니다. 뿐만아니라 pmd, findbugs, junit-report, cobertura 등의 코드분석 라이브러리가 생성하는 리포트들을 프로젝트 정보와 함께 하나의 사이트로 합쳐서 만들어줍니다. 아래는 메이븐 리포트 설정 예제입니다. 사실 default 설정을 따른다면 더 간단해질 수 있습니다.

 <reporting>
  <plugins>
   <!-- FindBugs 리포트 생성 플러그인 -->
   <plugin>
    <groupId>org.codehaus.mojo</groupId>
    <artifactId>findbugs-maven-plugin</artifactId>
    <version>1.2</version>
    <configuration>
     <threshold>Low</threshold
     <xmlOutput>true</xmlOutput>
    </configuration>
   </plugin>
   <!-- PMD 리포트 생성 플러그인 -->
   <plugin>
    <artifactId>maven-pmd-plugin</artifactId>
    <configuration>
     <rulesets>
      <ruleset>/rulesets/basic.xml</ruleset>
      <ruleset>/rulesets/unusedcode.xml</ruleset>
     </rulesets>
     <sourceEncoding>UTF-8</sourceEncoding>
     <targetJdk>1.5</targetJdk>
    </configuration>
   </plugin>
  ... ....
 </reporting>

Ant에서 이와 동일한 일을 처리하려면 각각의 코드분석 라이브러리에 대한 복잡한 XML 설정에다가, 결과 리포트들을 하나로 합치기까지 하고 싶다면 별도의 라이브러리(Glean, QALabXRadar 등)를 사용해야 하는 수고가 따릅니다.

Buildr도 여러가지 코드분석 리포트를 생성할 수 있습니다만, 아직은 좀 약합니다. 사실 내부적으로 리포트 생성은 AntWrap을 통해서 Ant 타스크를 호출하는 식으로 처리하고 있습니다. Ant 위에 얹혀살고 있는 셈이죠.

일단 Buildr 1.3.3은 junit, jdepend, cobertura, emma에 대한 리포트 생성 능력을 보유하고 있습니다.

- junit:report
- cobertura:xml, cobertura:html
- emma:xml, emma:html
- jdepend:xml, jdepend:text, jdepend:swing

1. JUnit / TestNG
Buildr 1.3.3에서는 기본적으로 junit 4.4 버전으로 테스트를 수행하고 리포트를 생성합니다. 테스트케이스 소스는 src/test/java에 있다고 가정합니다. 리포트는 ./reports/junit 아래에 생성됩니다. 경로는 Layout을 이용하면 바꿀 수 있습니다.(그러나 리포트 생성 디렉토리가 변경되지 않는 버그가 있네요).
테스트를 JUnit이 아니라 TestNG로 하고 싶으면 빌드스크립트에 test.using :testng 라고 한줄 써주면 됩니다. 쉽죠.
그외 다양한 테스트 옵션에 대한 내용은 여기여기를 참조하세요.

2.Cobertura / Emma
우선 buildfile에 require 'buildr/cobertura'(또는 require 'buildr/emma')를 선언합니다. 그러면 이제부터 빌드시 instrument 작업이 자동으로 함께 수행됩니다. 커버리지 리포트는 reports/cobertura(또는 reports/emma)에 만들어집니다.

3. JDepend
require 'buildr/jdepend'를 선언하고 jdepend:xml을 실행하면 ./jdepend.xml 파일이 생성됩니다. 생성된 xml을 jdepend.xsl 스타일을 적용하여 html로 바꾸는게 어려워보이지는 않은데 아직 html 변환까지는 지원하지 않네요.

그외 pmd와 findbugs는 제가 직접 만들어봤습니다. 자세한 실행 옵션은 코드를 보면 응용할 수 있을 겁니다.

4. PMD

task :pmd do
  pmd_classpath = transitive('pmd:pmd:jar:4.2.1').each(&:invoke).map(&:to_s).join(File::PATH_SEPARATOR)
  ant("pmd-report") do |ant|
    ant.taskdef :name=> 'pmd',
                :classpath=>pmd_classpath,
                :classname=>'net.sourceforge.pmd.ant.PMDTask'
    ant.pmd :rulesetfiles => 'basic,imports,unusedcode' do
      ant.formatter :type=>'xml', :toFile=> _(:reports, 'pmd.xml')
      #ant.formatter :type=>'html', :toFile=> _(:reports, 'pmd.html')
      compile.sources.each do |src|
        ant.fileset :dir=> src, :includes=>'**/*.java'
      end
    end
  end
end

5. FindBugs

  task :findbugs do
    findbugs_classpath = transitive('net.sourceforge.findbugs:findbugs-ant:jar:1.3.2').each(&:invoke).map(&:to_s).join(File::PATH_SEPARATOR)
    ant("findbugs-report") do |ant|
      ant.taskdef :name=> 'findbugs',
                  :classpath=>findbugs_classpath,
                  :classname=>'edu.umd.cs.findbugs.anttask.FindBugsTask'
      ant.findbugs :home => 'C:/findbugs-1.3.6', # 파인드버그 설치 경로
                   :reportLevel=>'high',
                   :output=>'xml',
                   :outputFile=>_(:reports, 'findbugs.xml') do
        ant.method_missing(:class, {:location=> compile.target})
      end
    end
  end

메이븐은 maven site 명령으로 한큐에 모든 코드분석작업 및 리포트 생성을 처리할 수 있습니다. Buildr은 이런 타스크가 없기 때문에 하나 만들어줍니다.

task :reports =>[:pmd, :findbugs, 'jdepend:xml', 'cobertura:xml', 'junit:report']

이제 'buildr 프로젝트명:reports' 명령으로 완벽하진 않지만 우리도 한큐에 코드분석을 처리할 수 있게 됐습니다. 떨궈진 xml 파일들은 Hudson 같은 CI툴과 연동하면 메이븐처럼 예쁘게 볼 수 있겠죠.

'Build&Deploy > Buildr' 카테고리의 다른 글

Buildr : 원격 서버에 배포하기  (0) 2008.12.26
Buildr : 설정정보 관리  (0) 2008.12.24
Buildr : 빌드결과 패키징  (0) 2008.12.18
Buildr : 아티팩트 다운로드 받기  (0) 2008.12.17
Buildr : 타스크 의존 관계  (0) 2008.12.11
Posted by 에코지오
,
빌드 결과물(어플리케이션)을 WAS에 배포(deploy)하거나 공유를 위해 배포(distribute)하기 위해 우리는 먼저 패키징을 합니다.
Maven에서 패키징은 package 단계(phase)에서 수행됩니다. pom.xml에 지정된 jar,war,ear 등의 packaging 타입에 따라서 적절한 파일들을 모아서 묶어냅니다. Buildr의 패키징도 메이븐만큼 쉽습니다.

먼저 컴파일된 클래스들을 모아 jar 파일로 묶어보죠.

package :jar

buildr package 명령을 실행하면 default로 target 디렉토리에 "#{project.name}-#{project.version}.jar' 파일이 만들어집니다. 파일의 이름을 바꾸고 싶으면 :file 옵션을 추가합니다.

package :jar, :file=>'target/sample.jar'

package 메소드가 입력받는 type에는 :zip, :jar, :war, :ear, :tar, :sources, :javadoc 등이 있습니다.
이번에는 웹어플리케이션을 war 로 묶어봅니다. (위의 package :jar 문을 지우지 않아도 됩니다. package 메소드는 여러번 사용가능하고, package 타스크는 각각의 패키지 파일들을 모두 만들어줍니다)

package :war

:jar 타입과 마찬가지로 default로 target 디렉토리에 "#{project.name}-#{project.version}.war' 파일이 만들어집니다. 만들어진 war 안에는 3가지 유형의 파일들이 포함됩니다.

(1) path_to(:source, :main, :webapp) 디렉토리 밑의 모든 파일들 : war 루트에 포함됨
(2) compile.target 디렉토리와 resources.target 디렉토리의 파일들 : WEB-INF/classes 에 포함됨
(3) compile.dependencies 아티펙트 파일들 : WEB-INF/lib 에 포함됨

여기서 메이븐과의 차이가 보입니다. 메이븐은 war 타입의 프로젝트에 대해서 패키징을 할 때 war:war 골이 실행되는데, war:war 골은 원본 webapp 디렉토리(src/main/webapp)의 파일들을 war로 묶지 않습니다. 대신 war:exploded 골에 의해 'target/프로젝트명' 디렉토리'로 빌드(복사)된 파일들을 war로 묶게 됩니다.

이것은 이클립스의 WTP가 웹어플리케이션을 빌드하는 것과 유사합니다. java 소스를 컴파일하여 class를 만들듯이, html, jsp 같은 웹파일들도 별도의 디렉토리에 빌드한다는 개념이 들어있습니다. 그래서 컴파일/빌드된 파일들만을 가지고 패키징을 합니다.

그러나 Buildr에는 메이븐의 war:exploded에 해당하는 작업이 없습니다. 메이븐 war 패키징이 war:exploded => war:war 순서로 진행된다면, Buildr의 war 패키징은 war:inplace => war:war 순서로 진행하는 것과 같습니다. 제 생각에는 메이븐 방식이 더 나아보입니다. 그래야 원본 웹파일들을 건드리지 않고 리소스 치환 같은 가공작업을 추가로 수행할 수 있기 때문입니다. 

다행히도 Buildr의 유연성 덕분에 war 안에 기본적으로 패키징되는 webapp 디렉토리를 쉽게 바꿀 수 있습니다. (일단 원본 웹파일들은 target/webapp 으로 복사된다고 가정합니다. filter 메소드로 간단히 처리가능하죠.)

# 소스 webapp 폴더를 패키징에서 제외하고 그대신 빌드된 webapp 폴더 포함
package(:war).exclude(_(:source, :main, :webapp)).include(_(:target, :main, :webapp), :as=>'.')

include와 exclude 메소드를 이용해서 쉽게 작업을 마쳤습니다. include 메소드에서 :as 옵션을 통해 target/webapp 폴더의 내용물이 war 파일의 최상위에 위치하게 했습니다. 그렇지 않으면 war 파일에 webapp 폴더 자체가 들어가게 됩니다. 이런게 귀찮으면 with 메소드를 쓰면 간단해집니다. package(:war).with _(:target, :main, :webapp)

위에서 compile.dependencies의 아티펙트 파일들이 war 안의 WEB-INF/lib 경로에 자동으로 함께 묶인다고 했습니다. 근데 WEB-INF/lib 경로에 함께 묶여서는 안되는(묶일 필요가 없는) 아티팩트 파일들이 존재할 수 있습니다. 메이븐으로 치자면 provided 나 system 스코프의 의존 라이브러리들이 이에 해당합니다. 이경우 이렇게 빼주시면 됩니다.

package(:war).libs -= artifacts(스펙목록)

또는 컴파일 의존 라이브러리 설정시 provided 스코프와 system 스코프의 라이브러리들을 변수에 할당하여 사용하는 것이 깔끔한 것같네요.

PROVIDED_DEPENDENCIES = [스펙1,스펙2,...]
SYSTEM_DEPENDENCIES = [스펙a,스펙b,...]

compile.with PROVIDED_DEPENDENCIES, SYSTEM_DEPENDENCIES,
                   'org.apache.axis2:axis2:jar:1.2',
                    transitive('org.acegisecurity:acegi-security:jar:1.0.5')

package(:war).libs -= artifacts(SYSTEM_DEPENDENCIES, PROVIDED_DEPENDENCIES)


package 타스크의 실행 순서와 관련하여 주의할 점이 있습니다. package 메소드는 타스크를 리턴합니다. 예를 들어, package :war 문은 WarTask 타스크 객체를 리턴합니다. 그런데 타스크를 리턴하기 전에, 방금 생성된 타스크를 프로젝트 'package' 타스크의 선행(의존) 타스크로 추가합니다. 따라서 package 타스크 실행전에 어떤 작업을 해야한다면, 그 작업에 대한 의존관계 문장은 package 메소드 문장보다 위에 와야합니다.

# (1) war 파일이 만들어지고 난 후에 before_package 타스크가 실행됩니다.
package :war, :file=>'target/myproject.war'
task :package=>[:before_package]

# (2) before_package 타스크가 실행된 후에  war 파일이 만들어집니다.
task :package=>[:before_package]
package :war, :file=>'target/myproject.war'

또하나 package 타스크에 후행 작업을 정의할 때 package 메소드를 쓰면 안됩니다. compile, build 같은 타스크의 경우는 compile do ~~~ end 식으로 써도 되지만, package 타스크는 task 메소드로 package 타스크를 찾아서 추가 액션을 넣어 주어야합니다.

task(:package) do
  ... ...
end

'Build&Deploy > Buildr' 카테고리의 다른 글

Buildr : 설정정보 관리  (0) 2008.12.24
Buildr : 코드분석 리포트 생성  (0) 2008.12.23
Buildr : 아티팩트 다운로드 받기  (0) 2008.12.17
Buildr : 타스크 의존 관계  (0) 2008.12.11
Buildr : 리소스 교체  (3) 2008.12.09
Posted by 에코지오
,

compile.with를 통해 컴파일에 필요한 의존 라이브러리(artifacts)를 지정하면 buildr은 컴파일 작업시 해당 라이브러리를 리모트 Maven 저장소로부터 다운로드 받습니다(이미 로컬 Maven 저장소에 있는 경우는 제외).

compile.with 'org.apache.axis2:axis2:jar:1.2'

하지만 buildfile 스크립트 내에서 임의로 우리가 라이브러리를 다운로드 받을 수도 있습니다.

아, 그보다 먼저 리모트 메이븐 저장소 주소를 buildr에 알려주어야 합니다. 2가지 방법이 있습니다.

1. 사용자홈/.buildr/settings.yaml 파일에 메이븐 저장소 주소 세팅

2. 빌드스크립트(buildfile)에서 세팅

#repositories.remote << 'http://www.ibiblio.org/maven2/' << 'http://download.java.net/maven/2/'
repositories.remote.push %w{ http://www.ibiblio.org/maven2/  http://download.java.net/maven/2/ }

다시 돌아와서, buildfile 스크립트 내에서 임의로 라이브러리를 다운로드받을 수 있습니다.

한 개 다운로드 : artifact(스펙).invoke
여러 개 다운로드 : artifacts(스펙목록).each(&:invoke)

예를 들어 findbugs.jar 와 findbugs-ant.jar를 다운 받고자 한다면 이런식으로 작성합니다.

FINDBUGS = ["net.sourceforge.findbugs:findbugs:jar:1.3.2",
                    "net.sourceforge.findbugs:findbugs-ant:jar:1.3.2"]
artifacts(FINDBUGS).each(&:invoke)

Buildr::group 메소드를 써서 FINDBUGS를 다르게 표현할 수도 있습니다.

FINDBUGS = Buildr::group %w{findbugs findbugs-ant},
                                     :under=>'net.sourceforge.findbugs',
                                     :version=> '1.3.2'

Maven은 transitive dependencies(의존성 전이)라고 해서 한다리 건너의 의존 라이브러리까지도 알아서 가져오는 기능을 제공합니다. Buildr도 아직 완벽하지는 않지만 의존성 전이를 지원합니다. 바로 transitive 메소드가 있습니다.

주어진 스펙이 의존하는 라이브러리까지 몽창 다운로드 : transitive(스펙목록).each(&:invoke)

예를 들어 findbugs-antfindbugs에 의존하고 다시 findbugs는 asm,bcel,dom4j 등에 의존합니다.(pom파일의 내용은 링크에서 확인가능합니다) 따라서 transitive 메소드를 이용하여 findbugs-ant를 다운로드 받으면 findbugs와 그것이 의존하는 asm 등도 함께 다운로드됩니다.

transitive('net.sourceforge.findbugs:findbugs-ant:jar:1.3.2').each(&:invoke)


transitive는 compile.with에도 사용 가능합니다. 아래처럼 설정하면 acegi-security가 의존하는 스프링프레임워크 모듈들도 컴파일 작업시 함께 다운로드될 것입니다.

compile.with transitive('org.acegisecurity:acegi-security:jar:1.0.5')

만약 내가 원하는 라이브러리가 메이븐 형식의 저장소에 없지만 웹사이트 어딘가에서 받을 수 있다면 download 메소드를 이용하여 다운로드 받을 url 주소를 직접 지정하여 파일을 다운로드 받을 수 있습니다.

보통 웹사이트에서 다운받기 : download(artifact(스펙))=>파일주소).invoke

아래 예제는 dojo:dojo:zip:widget:0.2.2 형식의 아티팩트를 메이븐저장소가 아니라 주어진 url로부터 다운로드받아 로컬 메이븐 저장소에 설치합니다(M2_REPO/dojo/dojo/0.2.2/dojo-0.2.2-widget.zip).

url = 'http://download.dojotoolkit.org/release-0.2.2/dojo-0.2.2-widget.zip'
download(artifact("dojo:dojo:zip:widget:0.2.2")=>url).invoke

'Build&Deploy > Buildr' 카테고리의 다른 글

Buildr : 코드분석 리포트 생성  (0) 2008.12.23
Buildr : 빌드결과 패키징  (0) 2008.12.18
Buildr : 타스크 의존 관계  (0) 2008.12.11
Buildr : 리소스 교체  (3) 2008.12.09
Buildr : 리소스 필터링  (0) 2008.12.09
Posted by 에코지오
,
Maven은 빌드에 필요한 라이브러리를 아래와 같이 설정합니다.

 <dependencies>
  <dependency>
   <groupId>junit</groupId>
   <artifactId>junit</artifactId>
   <version>3.8.2</version>
   <scope>test</scope>
  </dependency>
  <dependency>
   <groupId>commons-fileupload</groupId>
   <artifactId>commons-fileupload</artifactId>
   <version>1.1.1</version>
  </dependency>
  <dependency>
   <groupId>commons-lang</groupId>
   <artifactId>commons-lang</artifactId>
   <version>2.1</version>
  </dependency>
  ... ...
 </dependencies>

Buildr에서는 compile.with 메소드에 라이브러리 목록을 넘겨주어 의존성을 추가할 수 있습니다.

compile.with "org.apache.axis2:axis2:jar:1.2", "commons-fileupload:commons-fileupload:jar:1.1.1"

compile.with 메소드가 받아들이는 의존 라이브러리의 몇가지의 타입이 존재합니다.

1. 아티팩트(artifact) 스펙
위의 메이븐 pom에서 xml 형식으로 지정한 coordinates를 다음의 형식으로 지정합니다.

groupId:artifactId:packaging:version
groupId:artifactId:packaging:classifier:version

* 위의 형식 뿐 아니라 다양한 포맷으로 스펙을 지정할 수 있습니다. 여기를 참조하세요.

이렇게 아티팩트 스펙 형식으로 의존성을 추가하면 Buildr은 메이븐 레포지토리에서 해당 라이브러리를 다운받아 로컬에 설치합니다.

2. 다른 프로젝트
만일 다른 프로젝트의 패키징 결과물에 의존하고 있다면 그 프로젝트를 넘겨주면 됩니다.

compile.with projects('another-project', 'other-project')

3. 파일/디렉토리 경로
로컬에 존재하는 파일/디렉토리의 경로를 지정하여 의존성을 추가할 수 있습니다.
메이븐에서는 로컬 파일을 의존성에 추가하기 위해서 스코프를 system으로 잡고 파일의 절대경로를 지정하였습니다.

  <dependency>
   <groupId>weblogic</groupId>
   <artifactId>weblogic-api</artifactId>
   <version>10.0</version>
   <scope>system</scope>
   <systemPath>C:/bea/weblogic/xxx/wls-api.jar</systemPath>
  </dependency>

Buildr에서는 프로젝트에 대한 상대경로 또는 절대경로 모두 가능합니다.

compile.with 'C:/bea/weblogic/xxx/wls-api.jar' , 'lib/my-api.jar',

경로 지정시 path_to 메소드를 활용하는 것이 좋습니다.

compile.with path_to(:source,:main,:webapp,'WEB-INF/lib/my-api.jar')

또한 glob 패턴을 적용하여 파일을 지정할 수 있습니다. 메이븐도 이런게 되면 참 좋겠습니다.

compile.with FileList[path_to(:source,:main,:webapp,'WEB-INF/lib/*.jar'), 'lib/**/*.jar']

여기서 Rake::FileList를 사용했습니다. FileList 없이 그냥 패턴 문자열을 그대로 compile.with 메소드에 넘겨줄 수도 있습니다. 그러나 그렇게 되면 패턴 문자열이 해석없이 그대로 compile.dependencies에 할당되기 때문에 (단위테스트 등에서) 예상치못한 문제가 발생할 수 있습니다. 그래서 FileList를 통해 패턴을 해석한 뒤에 compile.with에 넘겨주는 것을 권장합니다.

Buildr에서는 놀랍게도 파일뿐 아니라 디렉토리도 의존성에 추가하는게 가능합니다.

compile.with '../AAA/classes'

다만, 이렇게 디렉토리를 의존성에 추가하고 war로 패키징하게 되면 war에 그 디렉토리가 포함이 됩니다. 이때는 그 디렉토리를 아래처럼 패키지 libs에서 빼주면 됩니다.

DEPEND_CLASSES =  '../AAA/classes'
compile.with DEPEND_CLASSES
package(:war).libs -= artifacts(DEPEND_CLASSES)

Posted by 에코지오
,
Maven에서는 자바 소스 컴파일시 옵션을 아래와 같이 추가할 수 있었습니다.

  <plugin>
    <groupId>org.apache.maven.plugins</groupId>
    <artifactId>maven-compiler-plugin</artifactId>
    <configuration>
      <source>1.5</source>
      <target>1.5</target>
      <encoding>UTF-8</encoding>

    </configuration>
  </plugin>

Buildr에서는 compile 타스크의 options 속성을 통하거나

compile.options.target = '1.5'
compile.options.source = '1.5'
compile.options.other = ['-encoding', 'UTF-8']

또는 using 메소드를 사용하여 컴파일 옵션을 설정할 수 있습니다.
 
compile.using :target=>'1.5', :source=>'1.5', :other=>['-encoding', 'UTF-8']

옵션 설정에 사용할 수 있는 심볼은 다음과 같습니다.

  • :warnings — Issue warnings when compiling. True when running in verbose mode.
  • :debug — Generates bytecode with debugging information. Set from the debug              
  • :deprecation — If true, shows deprecation messages. False by default.
  • :source — Source code compatibility.
  • :target — Bytecode compatibility.
  • :lint — Lint option is one of true, false (default), name (e.g. ‘cast’) or array.
  • :other — Array of options passed to the compiler (e.g. ’-implicit:none’)
  • Posted by 에코지오
    ,
    Buildr의 기본 프로젝트 구조는 Maven2의 그것과 거의 동일합니다.

      src
      |__main
      |    |__java              <-- Source files to compile
      |    |__resources      <-- Resources to copy
      |    |__webapp         <-- For WARs
      |__test
      |    |__java              <-- Source files to compile (tests)
      |    |__resources      <-- Resources to copy (tests)
    target                       <-- Packages created here
      |__classes             <-- Generated when compiling
      |__resources          <-- Copied (and filtered) from resources
      |__test/classes       <-- Generated when compiling tests
      |__test/resources    <-- Copied (and filtered) from resources
    reports                     <-- Test, coverage and other reports

    Maven에서 기본 프로젝트 디렉토리 구조를 아래처럼 세팅하여 변경할 수 있었습니다.

     <build>
      <directory>target</directory>
      <sourceDirectory>src</sourceDirectory>
      <outputDirectory>web/WEB-INF/classes</outputDirectory>
      <resources>
       <resource>
        <directory>src</directory>
        <excludes>
         <exclude>**/*.java</exclude>
        </excludes>
       </resource>
      </resources>
        ... ....
       <plugin>
        <artifactId>maven-war-plugin</artifactId>
        <version>2.1-alpha-2</version>
        <configuration>
         <warSourceDirectory>web</warSourceDirectory>
         <webappDirectory>${project.build.directory}/webapp</webappDirectory>
        </configuration>
       </plugin>


    Buildr도 디렉토리 구조를 바꿀 수 있습니다. 프로젝트 정의 메소드에 Layout 인스턴스를 전달해주면 됩니다.
    ( http://incubator.apache.org/buildr/extending.html#using_alternative_layouts )

    my_layout = Layout.new
    my_layout[:source, :main, :java] = 'src'
    my_layout[:source, :main, :resources] = 'src'
    my_layout[:source, :test, :java] = 'test'
    my_layout[:source, :test, :resources] = 'test'
    my_layout[:source, :main, :webapp] = 'web'

    my_layout[:target, :main, :classes] = 'web/WEB-INF/classes'
    my_layout[:target, :main, :resources] = 'web/WEB-INF/classes'
    my_layout[:target, :test, :classes] = 'target/test-classes'
    my_layout[:target, :test, :resources] = 'target/test-classes'
    my_layout[:target, :main, :webapp] = 'target/webapp'
    my_layout[:target, :main, :htdocs] = 'target/htdocs'

    my_layout[:reports] = 'target/reports'

    define "MyProject", :layout=>my_layout do

      project.version = VERSION_NUMBER
      project.group = GROUP
      manifest["Implementation-Vendor"] = COPYRIGHT
      ... ...
      resources.exclude '**/*.java'
      test.resources.exclude '**/*.java'
      ... ...
    end


    (위에서 :htdocs는 제가 임의로 사용한 심볼입니다)

    'Build&Deploy > Buildr' 카테고리의 다른 글

    Buildr : 리소스 필터링  (0) 2008.12.09
    Buildr : 파일집합 복사하기  (0) 2008.12.05
    Buildr : 파일 집합 선택  (0) 2008.12.01
    Buildr : 의존성(dependencies) 설정하기  (4) 2008.11.19
    Buildr : 컴파일 옵션 설정하기  (2) 2008.11.18
    Posted by 에코지오
    ,

    메이븐에서는 기본적으로 자바 소스 폴더를 한 개만 지정할 수 있습니다.

     <build>
        <sourceDirectory>src/main/java</sourceDirectory>
     ....
     </build>

    하지만 때로는 자바 소스가 여러 폴더에 흩어져 있는 경우도 있습니다.
    메이븐에서는 그럴 경우 프로젝트를 분리하라고 권장합니다.
    그러나 프로젝트를 분리할 형편(?)이 안되거나 분리하기 싫다면 어떻게 할까요?

    Build Helper Maven 플러그인을 이용하면 됩니다.
    build-helper 플러그인의 add-source 모조는 POM에 소스 디렉토리를 추가해줍니다. 아래처럼 사용할 있습니다.

      <plugin>
        <groupId>org.codehaus.mojo</groupId>
        <artifactId>build-helper-maven-plugin</artifactId>
        <version>1.2</version>
        <executions>
         <execution>
          <id>add-source-dir</id>
          <phase>generate-sources</phase>
          <goals>
           <goal>add-source</goal>
          </goals>
          <configuration>
           <sources>
             <source>another/src/main/java</source>
             <source>others/src</source>
           </sources>
          </configuration>
         </execution>
        </executions>
      </plugin>


    Posted by 에코지오
    ,

    메이븐에서 이게 가능한가요? 

    Ant에서는 classpath 엘리먼트를 통해서 클래스가 포함된 디렉토리를 컴파일 패스에 추가할 수 있습니다.

        <classpath>
          <pathelement location="mydir/classes"/>
        </classpath>

    이것과 동일한 기능을하는 메이븐 설정/플러그인이 있나요?

    아무리 구글링하고 찾아봐도 방법을 모르겠습니다.

    아시는 분은 좀 알려주시길...

    Posted by 에코지오
    ,